Authenticating on a web application with ACS
- Connect to ACS. You need to be made a co-Administrator to be
able to create a new Access Service instance. Create a new one. Call it something
relevant (namespace). Once it is created, if you try to access it from the “Access
Control Service” button in the ribbon, you might get a 403 error. The original
Administrator of the Azure account needs to go in and under the new ACS
instance, User Management, add you as an admin. Only then will you see the
options.
- Create a new Relying party. Add the realm and return address
to be the new Azure web app url (with https), leave the certify as default, let
it create a new rule group. Leave all as defaults.
- The identity provider is Windows Live Identity Provider-
this is already there out-of-the-box. You are good to go with that. This means you will log in with your Microsoft Live Id.
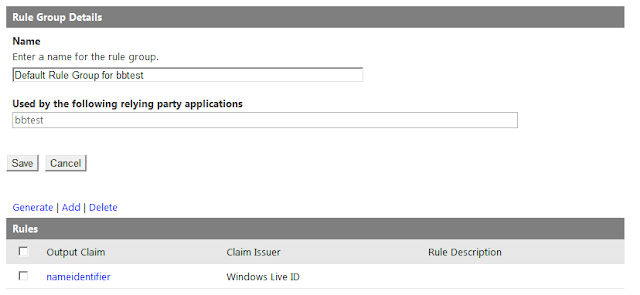
- Edit the rule group, make sure you add a new group for
“nameidentifier”.
- Set up the web application for ACS:
- You need Identity Foundation SDK 4 installed. Once
installed, the FedUtil (old utility) will be part of Visual Studio. When
clicking a web project, you will have a new option in the Tools menu called
“Add STS reference”. Add the STS reference. Set the path to its own web.config(it
will try to update as a result), set the URL to be the https url of the Azure
web app url, add an existing STS by referencing its metadata file. You can get
the metadata file from the ACS menu:
- This adds a new section to the web.config file of
the web application, called “Microsoft.IdentityModel”. This new section
contains the url of the ACS (Access Control Service Instance you have to set
up), the URL of the web application (https://servername),
and other data.


No comments:
Post a Comment